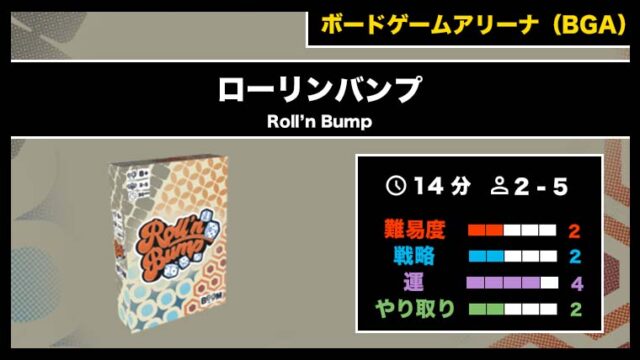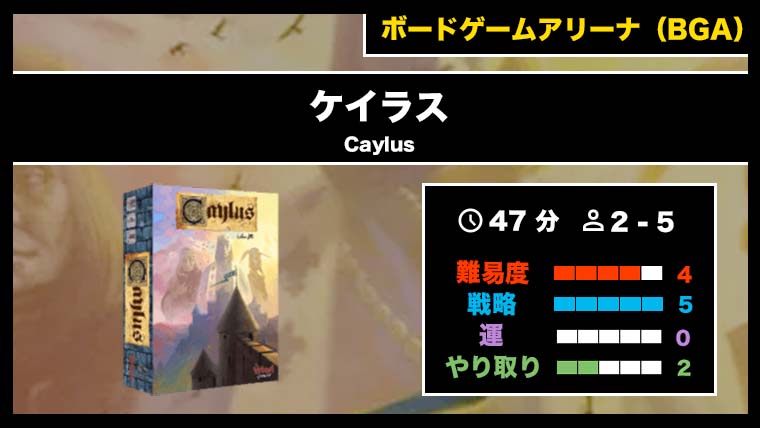
『ケイラス(Caylus)(BGA)』の遊び方・魅力をご紹介!
| ボードゲームの基本情報 | |||
|---|---|---|---|
| タイトル | ケイラス(Caylus) | ||
| 特徴 | ケイラス(Caylus)はWilliam Attiaによってデザインされ、Ystari Gamesによって発行されたゲームです。 | ||
| プレイ人数 | 2 - 5 人 | プレイ時間 | 47 分 |
| ゲームデザイナー | William Attia | 複雑さ | 4 |
| アートワーク | Arnaud Demaegd | 戦略 | 5 |
| エディター | Ystari Games | 運 | 0 |
| 発売日 | 2005 | やり取り | 2 |
※画像・基本情報はボードゲームアリーナ公式HPより
ケイラス(Caylus)とは?
ケイラス(Caylus)の遊び方
ゲームの準備
各プレイヤーは6人の労働者を持ち、これらは(1デニエのコストで)行動スポットに配置してリソースを取得したりアクションを実行したりできます。
新しい建物や城の一部を構築すること、他のプレイヤーがあなたの建物を使用すること、および王の好意を得るなどの経路を通じて勝利点が得られます。
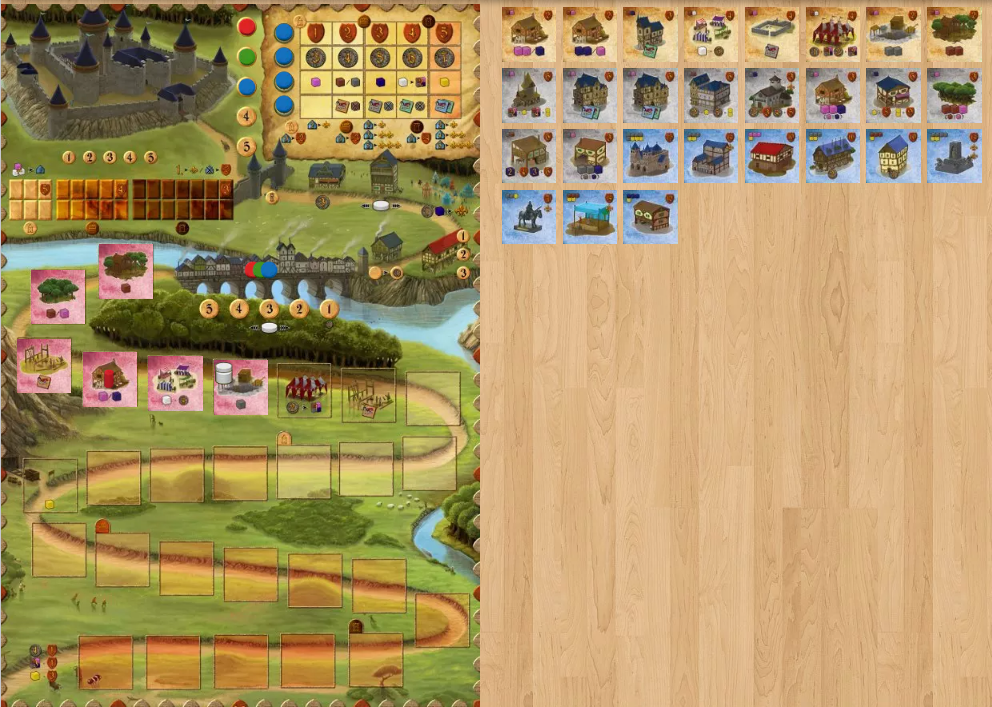
最初の画面は以下のようになります
ゲームの流れ
各ラウンドは7つのフェイズで構成され、ゲーム内の3か所で城の建設に対する好意を授与する第8のフェーズが発生します。
1. 収入フェイズ
2. 労働者の配置フェイズ
3. 建物稼働(1)フェイズ
4. 監督移動フェイズ
5. 建物稼働(2)フェイズ
6. 宮殿建設フェイズ
7. ラウンド終了フェイズ
1. 収入フェイズ
全プレイヤーは2コインを獲得します。
以下のいずれかを所有している場合、追加でコインを受け取ります。
| 建物 | 名称 | 追加コイン |
|---|---|---|
 | 居住地 | 1コイン |
 | 図書館 | 2コイン |
 | ホテル | 2コイン |
2. 労働者の配置フェイズ
プレイヤーは順番に労働者を配置するかパスし、ターンオーダートラックに従って、すべてのプレイヤーがパスするまで続けます。
パス
労働者を中立の建物に配置
労働者を他人の所有する建物に配置
労働者を自分の所有する建物に配置
労働者を城に配置
配置はボード上のどの未占有の場所または建物にでも行えます。他のプレイヤーが所有する建物に配置した場合、そのプレイヤーは1VPを獲得します。
自分の建物であるか、またはインの最も右のスポットに労働者がいる場合は1デニエを支払います。それ以外の場合は、ブリッジ上の最も低い未占有の数に支払います。[例外: 2人プレイのケイラスでは、相手プレイヤーがパスした場合、2ではなく3デニエを支払います。]支払いは他のプレイヤーではなく銀行に行きます。
パス: ブリッジの最も低い数にマーカーを置きます。最初にパスする場合、1デニエを獲得します。
3. 建物稼働(1)フェイズ
3: ブリッジの前の場所をアクティブ化 ゲートから始まり、労働者のいる場所はすべてアクティブ化され、労働者はプレイヤーに戻ります。
ゲート: 労働者を無料でボード上の任意の未占有の場所に移動します。他のプレイヤーが所有する建物である場合、彼らは1VPを獲得します。
トレーディングポスト: 3デニエを獲得します。
商人ギルド: プロヴォストを3つ前後に無料で移動します。
ジョースティングフィールド: 王の好意を得るために1デニエ+1クロスを支払います。
ステーブル: ターンオーダートラックで示された番号にマーカーを移動します。ステーブルにいないすべてのプレイヤーは、それに応じてターンオーダーを下げます。 (注意:2人プレイの場合、ターンオーダーは固定されているため、ステーブルは使用されません。)
宿屋: 労働者が左のスポットにある場合は、それを右のスポットに移動させ、そこにいる労働者を所有者に返します。右のスポットにいる場合は、労働者をそのまま残すか回収するか選択できます。 (このスポットの効果は上記のフェーズ2でのみ利用可能です。)
4. 監督移動フェイズ
4: ブリッジ
パスの順に、最初から最後まで、プレイヤーは1デニエのスクエアごとにプロヴォストを前後に移動できます。最大3スクエアまで。
5. 建物稼働(2)フェイズ
建物をアクティブ化
ブリッジを過ぎてから、順番に、労働者のいる建物がアクティブ化され、労働者はプレイヤーに戻ります。プロヴォストを超えた建物の上の労働者はアクティブ化されずに戻ります。
いくつかの建物に関する注意:
生産: 他のプレイヤーによってアクティブ化された3つの石製品ビルは、所有者にも括弧内のオプションから選んで1つのリソースを付与します。
建設: 大工は木造建築物を建設することを可能にし、石工は石造建築物を建設します。弁護士は中立の建物または所有する建物を住宅に変え、1デニエ+1クロスを支払います。 (弁護士または名声のある建物を変換することはできません。)建築家は住宅の1つに名声のある建物を建設することを許可します。
建物を建設するには、カードにリストされたリソースが必要です。 (白いキューブ=任意のリソース。)建物が建設されると、その右上隅に示されたVPをスコアリングします(住宅は常に2VPです)。一部の建物はまた王の好意を授与します(教会、像など);モニュメントは2つの王の好意を授与します。
建物の上に労働者がいる場合、変換は労働者のアクションの後に延期されます。ピンク(中立)の建物に建てる場合、それはゲームから永久に削除されます。自分の建物の上に建てる場合、それは使用可能な建物のストックに戻り、後で再構築できます。
城を建てる
城に配置された順に、各プレイヤーは好きなだけユニットを建設します。ユニットは異なる3つのリソースが必要で、そのうちの1つは食品でなければなりません。城に労働者がいてもユニットを構築しない場合、2VPを失います。
各ユニットは次のようにVPがあります:ダンジョンに対して5VP、壁に対して4VP、タワーに対して3VP。
各セクションは順番に建設されます(ダンジョン、壁、タワー)。通行人によって道路上のセクションマーカーが通過した場合、前のセクションが不完全であっても次のセクションで作業が続行されます。セクションが埋まった場合、次のセクションで作業が直ちに開始されます。
ターンごとに最も多くのユニットを建設したプレイヤーは1つの王の好意を獲得します。引き分けの場合、最初に建てたプレイヤーが好意を獲得します。
バイリフの前進
プロヴォストがバイリフの上または後ろにある場合、バイリフを1つ前に進めます。プロヴォストがバイリフの前にある場合、バイリフを2つ前進させます。その後、プロヴォストは再びバイリフの上に置かれます。
城のステージ
城のステージを構築するには、食品である必要がある3つの異なるリソースを消費します。バイリフが道路の3つのセクションマーカーのいずれか(ダンジョン、壁、タワー)の上にあるか過ぎている場合、プレイヤーは好意を得たりVPを失ったりします。
ダンジョン:住居なし= -2VP;住居2つ以上= 1好意
壁:住居なし= -3VP;住居2つ= 1好意;住居3/4つ= 2好意;住居5つ以上= 3好意
タワー:住居なし= -4VP;住居2/3つ= 1好意;住居4/5つ= 2好意;住居6つ以上= 3好意
タワーセクションマーカーが到達されるか、タワーがすでに完全に建設されている場合、ゲームは終了し最終スコアが発表されます。それ以外の場合は新しいターンが始まります(ステップ1)。 (注意:2人プレイの場合、ターンオーダートラック上のプレイヤー間で自動的に最初のプレイヤーが切り替わります。)
最終スコア
ゲーム中に得たVPに加えて、金のキューブ1つあたり3VP、他の4つのリソースタイプのキューブ3つにつき1VP、および4デニエごとに1VPを獲得します。
王の好意
VP、デニエ、リソース、または建物の割引で構築する能力を授与する4つのトラックがあります。各好意を獲得するたびに、1つのトラックで1スペース進めるか、好みに応じてより低い好意を選択できます。最初の2スペースだけが最初に利用可能で、ダンジョンが建設されると最初の4スペースが利用可能になり、壁が建設されると5番目のスペースが利用可能になります。 (可用性はフェーズ8のスコアリング後にのみ変更されます。)
一度に複数の好意が得られる場合、それらはすべて異なるトラックから取得する必要があります。したがって、一度に4つの好意しか獲得できません。 (例:建設好意でモニュメントを建てた場合、それから得られた好意を建設に使用することはできません。)
建設好意は、ボード上に石工、弁護士、または建築家がいないか、労働者によって占有されていても呼び出すことができます。
Setup and Goals
Each player has 6 workers, who may (for one denier) be placed on action spots to acquire resources or perform actions. Victory points are earned via constructing new buildings or parts of the castle, by other players making use of your buildings, and by other routes such as earning the King’s favour.
Rounds
Each round consists of seven phases, with an eighth (awarding favours for constructing the castle) that occurs at 3 designated points in the game.
1: Income
Each player receives 2 deniers, plus 1 denier per residence owned, 1 denier if they own the Library, and 2 deniers if they own the Hotel.
2: Place Workers
Players in turn either place a worker or pass, in the order dictated by the turn order track, until everyone has passed.
Placement may be on any unoccupied place or building on the board. If it is a building owned by another player, that player receives 1 VP.
If it is your own building, or if you have a worker in the Inn’s rightmost spot, pay 1 denier. Otherwise, pay the lowest unoccupied number on the bridge. [EXCEPTION: in 2-player Caylus, pay 3 deniers, not 2, once the other player passes.] Payments go to the bank, not other players.
Passing: place a marker on the lowest number on the Bridge. If you are first to pass, gain 1 denier.
3: Activate Places Before the Bridge
Beginning with the Gate, any place with a worker is activated, and the worker returns to the player.
GATE: Move the worker to any unoccupied place on the board for free. If it is a building owned by another player, they earn 1 VP.
TRADING POST: Gain 3 deniers.
MERCHANTS’ GUILD: Move the provost up to 3 squares forward or back, for free.
JOUSTING FIELD: Pay 1 denier + 1 cloth to earn a royal favour.
STABLES: Move your marker to the indicated number in the turn order track; all players not in the Stables move down the turn order accordingly. (NOTE: the Stables are not used in 2-player games, as turn order is fixed.)
INN: If your worker is on the left spot, move it to the right spot and return any worker there to its owner. If you are in the right spot, you can either leave your worker there or reclaim it. (The effects of this spot are only available in phase 2, above.)
4: The Bridge
In order of passing, from first to last, players may move the Provost forward or back, for one denier per square, to a maximum of 3 squares.
5. Activate Buildings
Past the bridge, in order, buildings with workers are activated, and the worker is returned to the player. Workers on buildings beyond the Provost are returned without activating those buildings.
Notes on some buildings:
Production: The 3 stone production buildings when activated by another player also grant one resource to the owner, chosen from the options in brackets.
Construction: The Carpenter allows you to construct wood buildings; the Mason, stone buildings. The Lawyer changes a neutral building or one you own into a residence, for 1 denier + 1 cloth. (You cannot transform the Lawyer or a prestige building.) The Architect permits you to construct a prestige building over one of your residences.
Constructing a building requires the resources listed on its card. (A white cube = any resource.) When a building is constructed, score the VPs indicated in its top right corner (residences are always 2 VPs). Some buildings also grant a royal favour (Church, Statue, etc.); the Monument grants 2 royal favours.
If you build over a building with a worker on it, the transformation is postponed until after the worker’s action. If you build over a pink (neutral) building, it is permanently removed from the game; if you build over one of your own buildings, it returns to the stock of available buildings and may be reconstructed further down the road.
6. Build the Castle
In the order that workers were placed in the castle, each player builds as many units as they like. A unit costs 3 different resources, of which one must be food. If you have a worker in the castle but do not construct a unit, lose 2 VPs.
Each unit is worth VPs as follows: 5 VPs for the Dungeon, 4 VPs for the Walls, 3 VPs for the Towers.
Each section is built in order (Dungeon, Walls, Towers). After a section marker is passed on the road by the Bailiff, work continues in the next section even if the previous one is incomplete. If a section is filled, work immediately commences on the next section.
The player who constructs the most units in a turn earns one royal favour. If there is a tie, the player who built first wins the favour.
7. The Bailiff Advances
If the Provost is on top of or behind the Bailiff, advance the Bailiff one space. If the Provost is ahead of the Bailiff, advance the Bailiff two spaces. The Provost is then placed atop the Bailiff again.
8. Stages of the Castle
To build a stage of the castle, spend 3 different resources, one of which must be food. If the Bailiff now rests on or past one of the three section markers on the road (Dungeon, Walls, Towers), players earn favours or lose VPs as follows:
Dungeon: no house = -2 VPs; 2+ houses = 1 favour
Walls: no house = -3 VPs; 2 houses = 1 favour; 3/4 houses = 2 favours; 5+ houses = 3 favours
Towers: no house = -4 VPs; 2/3 houses = 1 favour; 4/5 houses = 2 favours; 6+ houses = 3 favours
If the Tower section marker is reached, or if the Towers are fully constructed already, the game is over and final scoring occurs; otherwise, a new turn begins (Step 1). (NOTE: In a 2-player game, first player switches automatically between players on the turn order track.)
Final Scoring
In addition to the VPs gained during the game, gain 3 VPs per gold cube, 1 VP per 3 cubes of the other 4 resource types, and 1 VP per 4 deniers.
Royal Favours
There are 4 tracks, which award VPs, deniers, resources or the ability to construct buildings at a discount. Each time you gain a favour, you may advance one space on one track, or select a lower favour if you prefer. Only the first 2 spaces are available initially; after the Dungeon is built the first 4 spaces become available; after the Walls are built the 5th space is available. (The availability changes only after Phase 8 scoring.)
If multiple favours are gained at once, they must all be taken from different tracks; thus you may only gain 4 favours at once. (E.g. if you build the Monument with the construction favour, you may not use the favour earned from it for construction.)
The construction favours may be invoked even if there is no Mason, Lawyer or Architect on the board, or if they are occupied by a worker.